| Note |
|---|
I would like to bring to your attention that migration is available for "Calendar for Jira" versions 3.9.0 and later. We highly recommend you migrate to a test cloud instance first. |
The migration service is in early access. To enable it, please write to us at support@doitb.com. Be sure to include the URL-address of your Jira Cloud instance.
Migration Checklist
- Install/upgrade the calendar to version 3.9.0 or higher.
- Install the "Calendar for Jira" in your new cloud instance.
- Enable the migration feature option by writing to us at support@doitb.com.
- Update Cloud Migration Assistant to the latest up-to-date version.
- Make sure you have admin rights for your cloud instance.
Migration Process
Very detailed information on how to migrate your data from the server version of the jira to the cloud version is described here.
I will give you the short version:
Go to “Migration to Cloud". System → IMPORT AND EXPORT → Migrate to Cloud
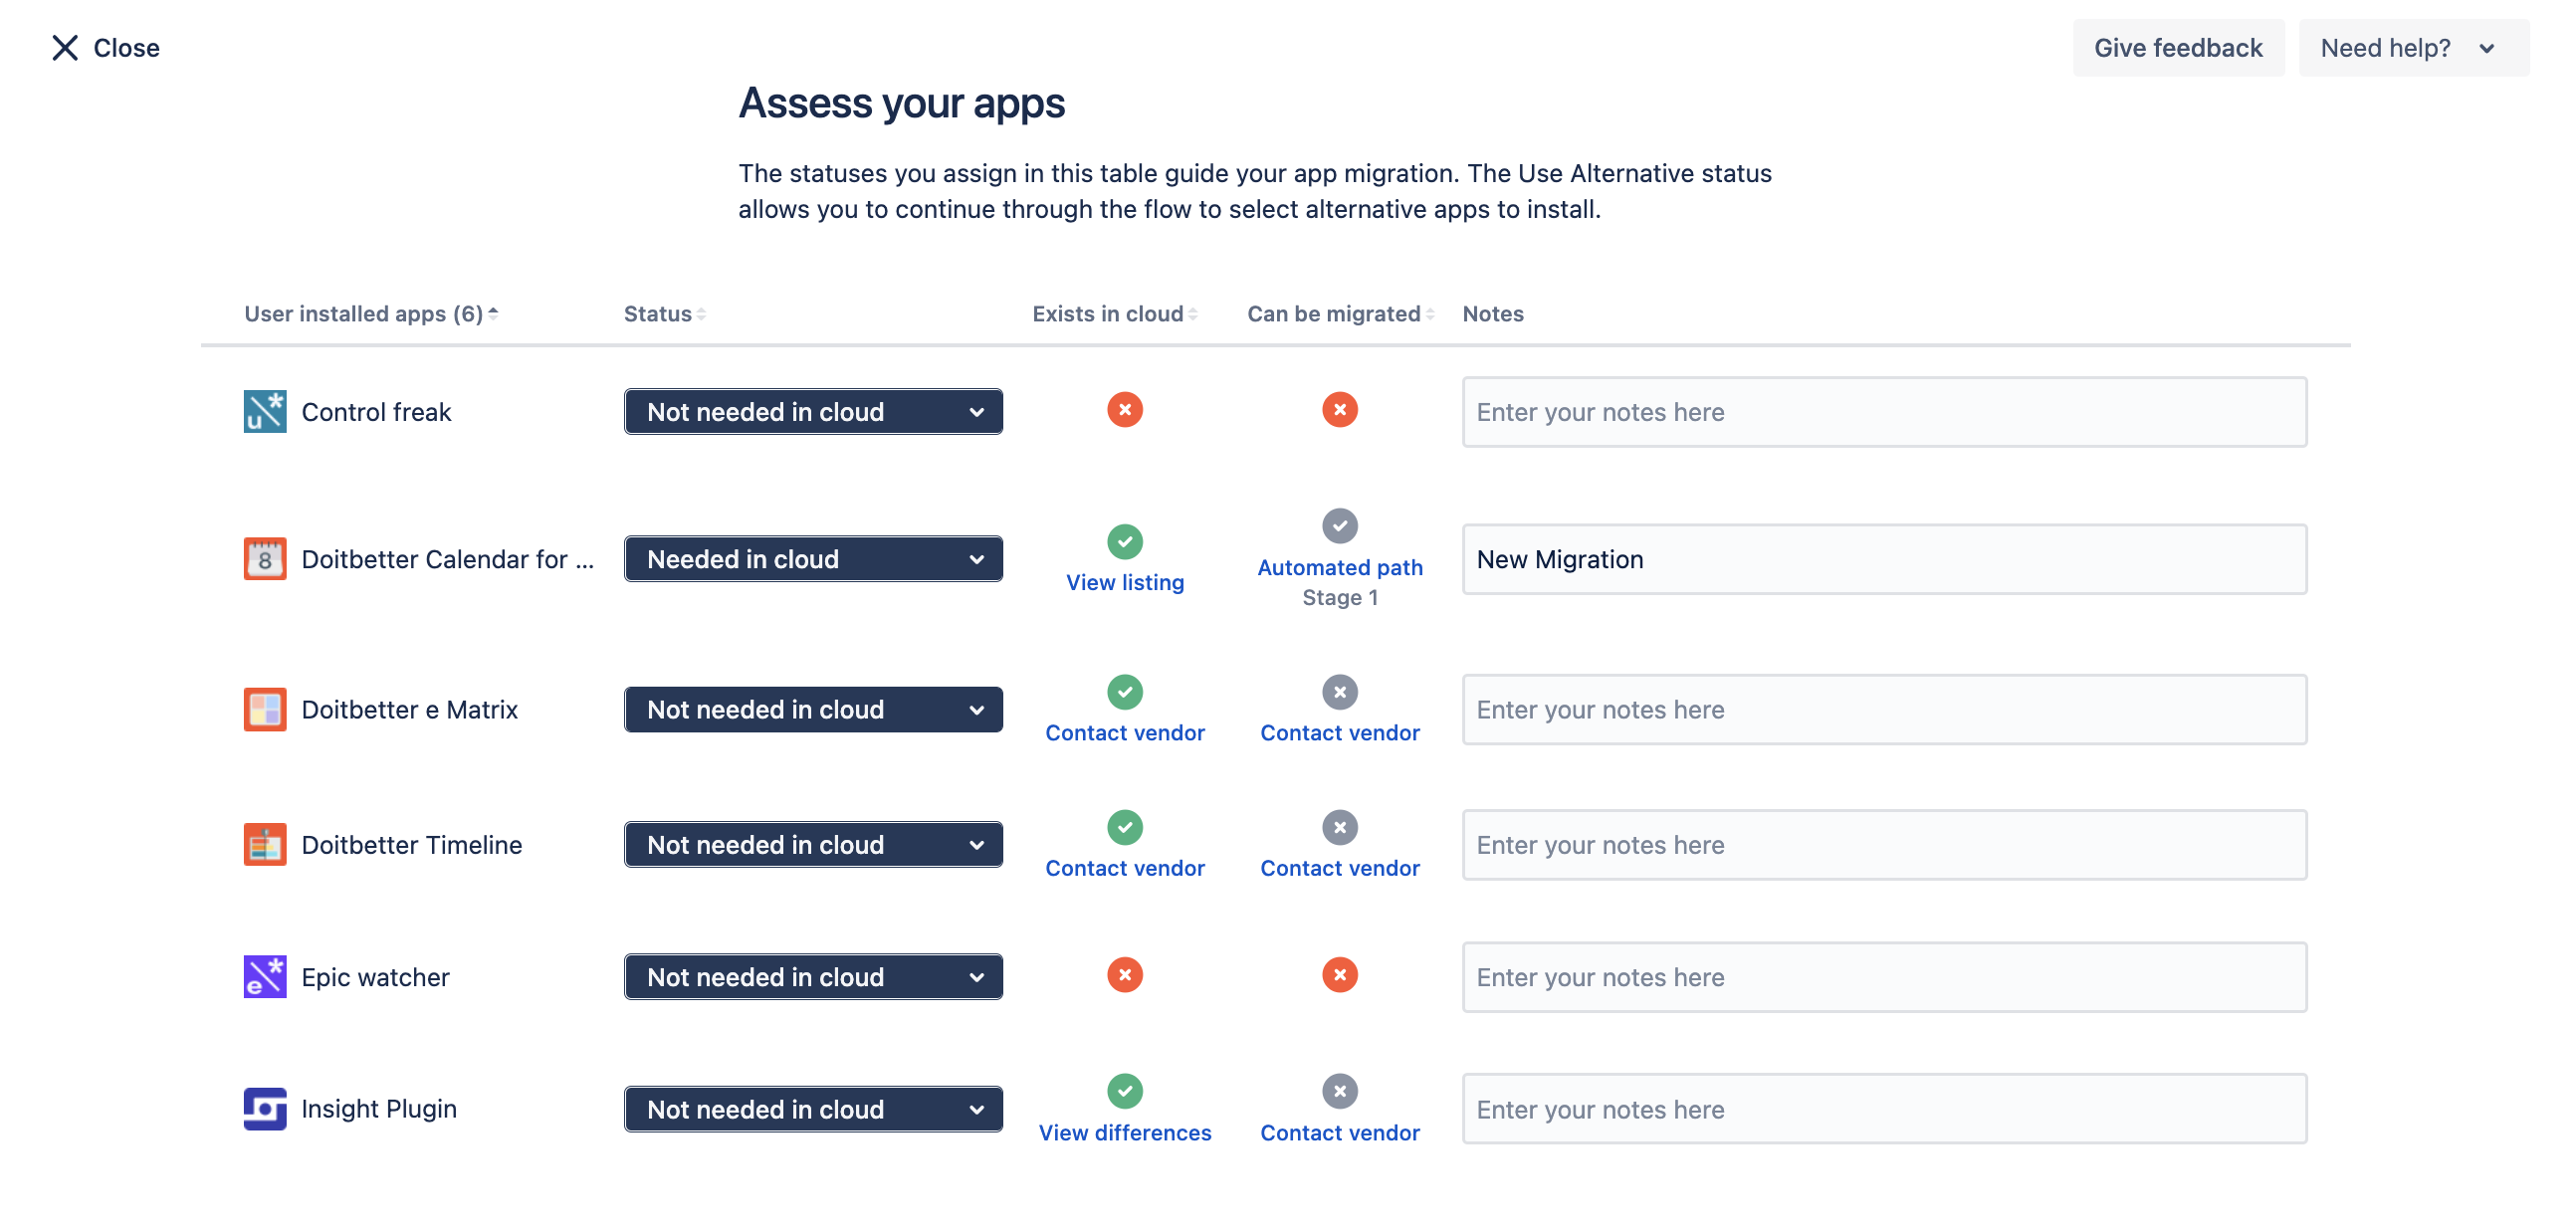
Assess “Calendar for Jira" as Needed in Cloud.

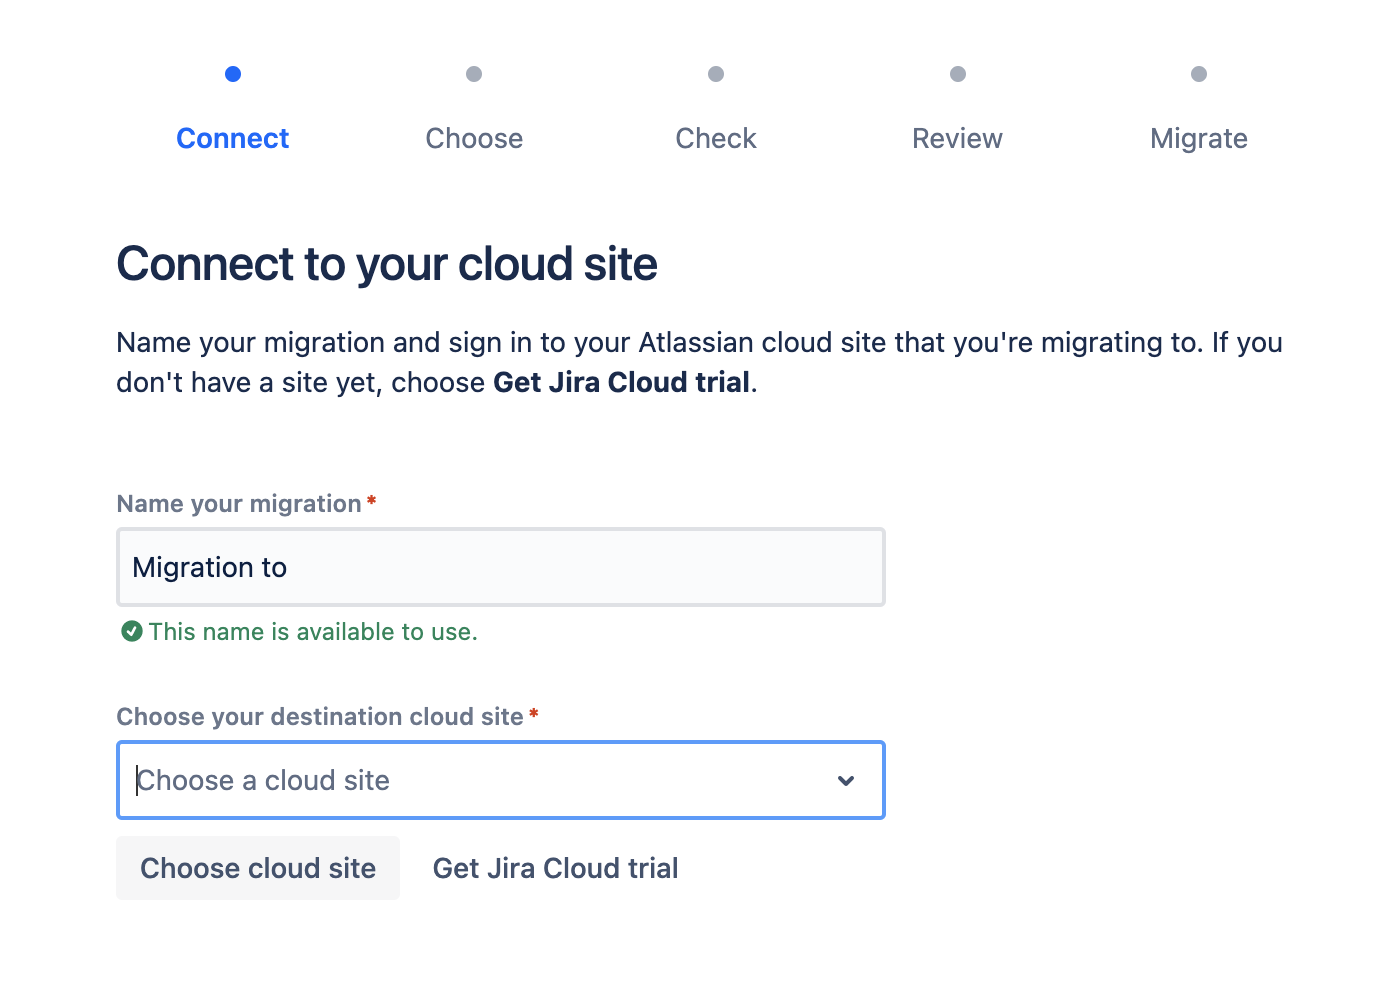
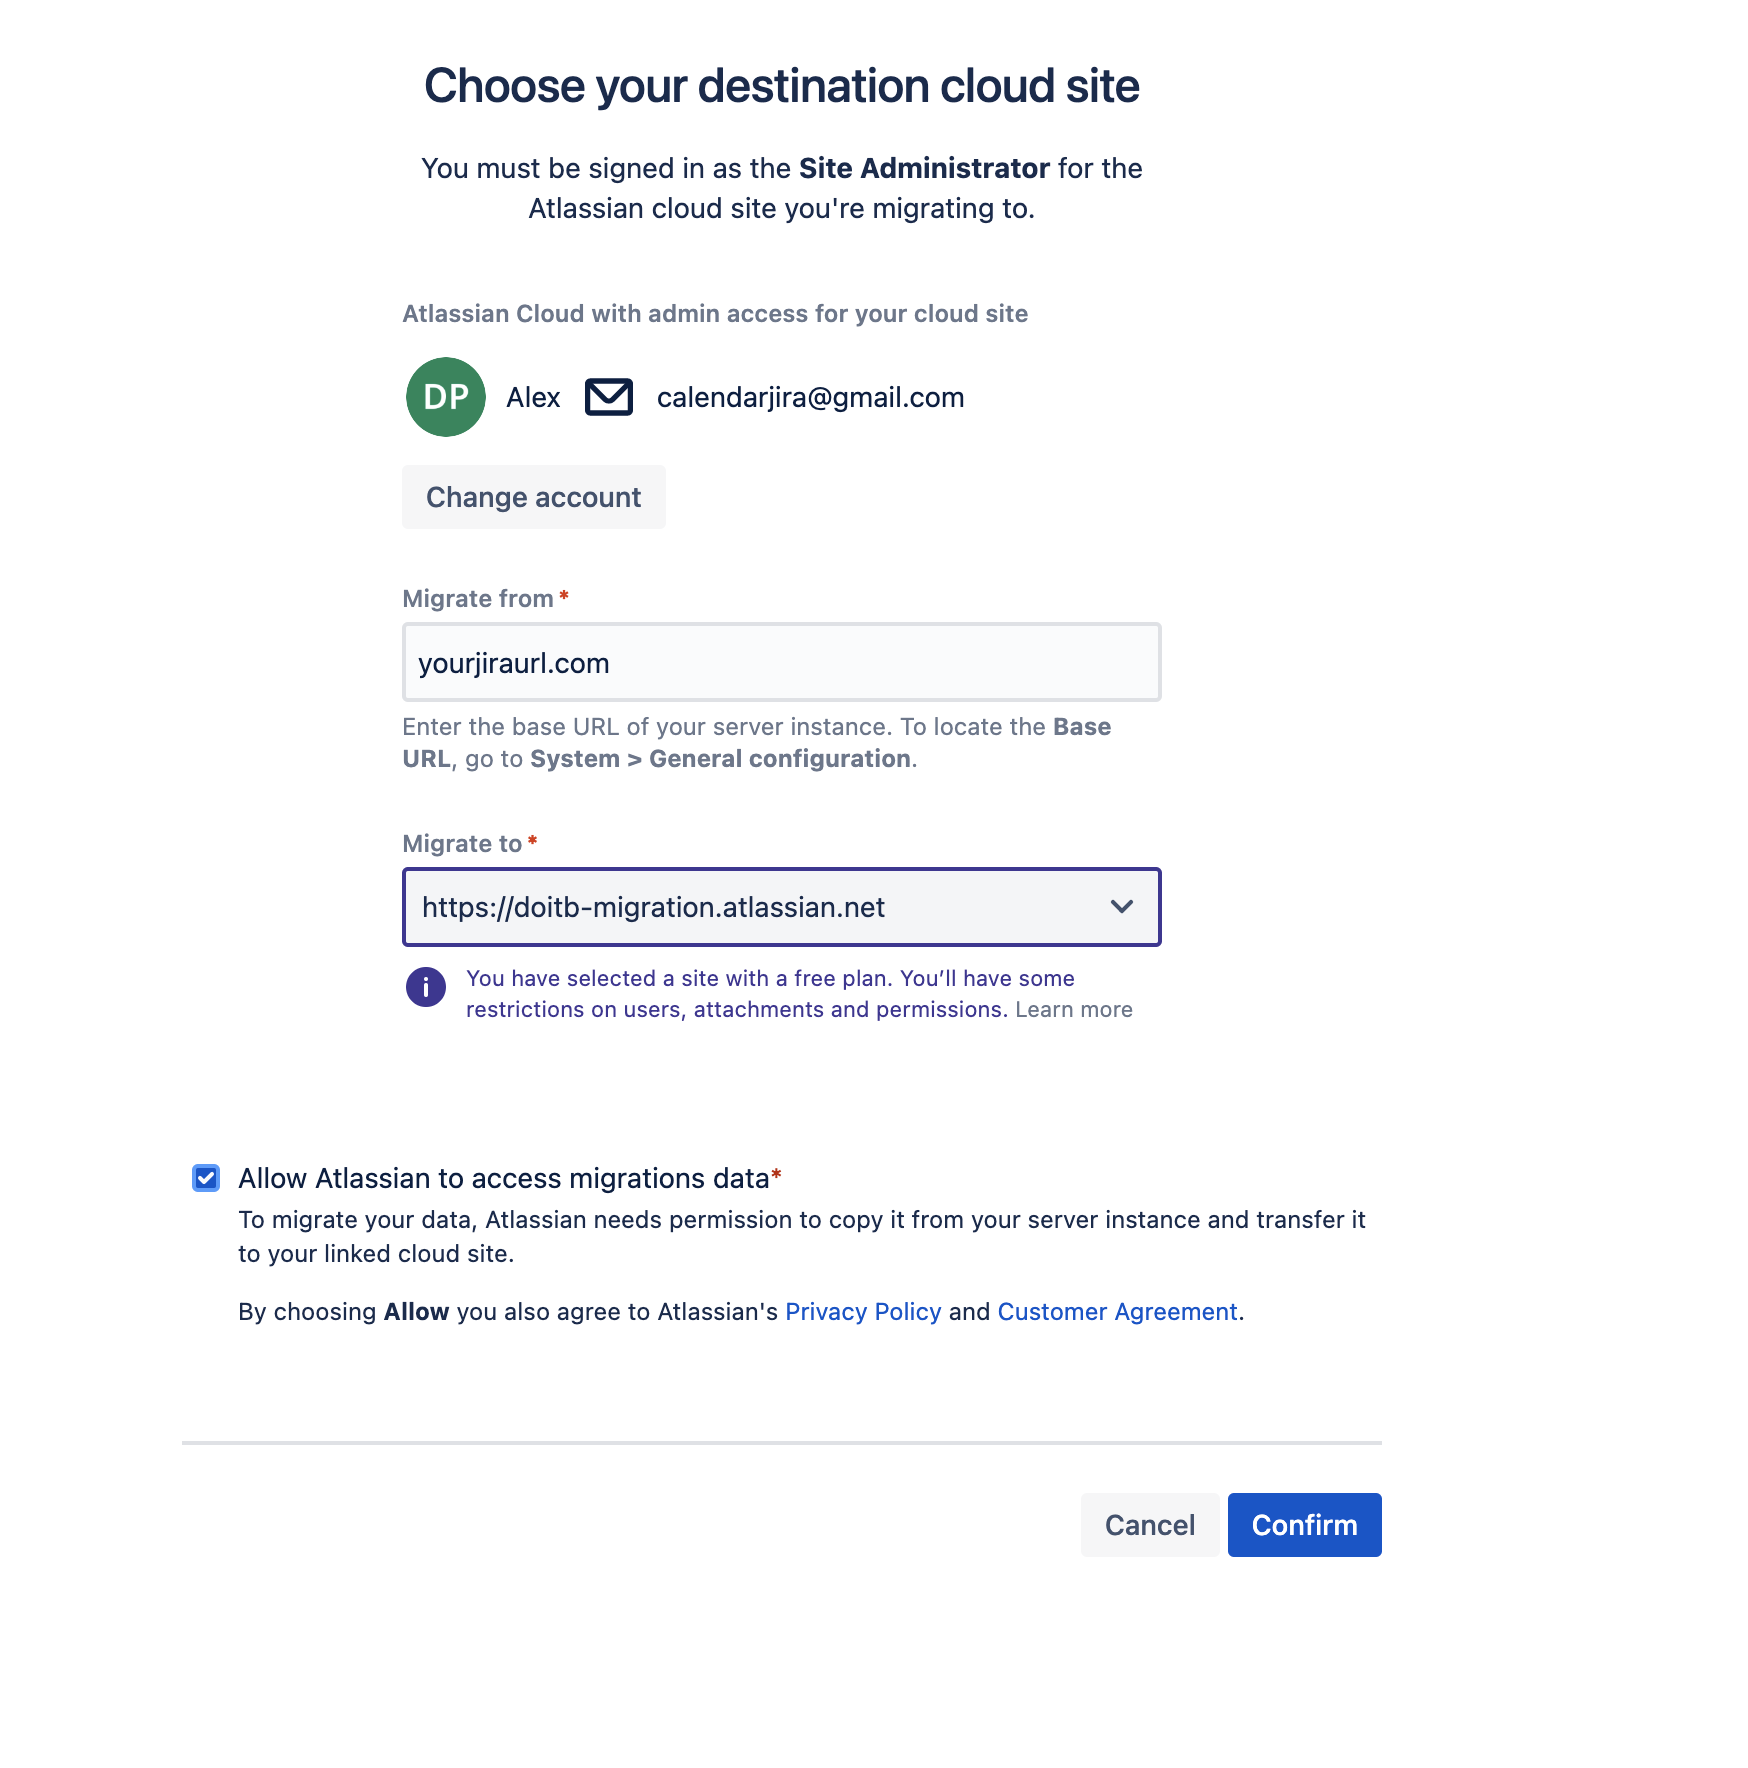
Connect your cloud instance to your server instance. Make sure you are logged in as a user who has admin rights to the cloud instance.
Create a new migration. Specify the address of your server jira, from which the data will be transferred.
Select the necessary migration options. The last one is important for us, the application migration option. The calendar supports both complete and partial migration. In other words, if additional data suddenly appears in the server version that must be transferred, you must repeat the process, select the application migration option, and skip the remaining options.
| Info |
|---|
It is important for the calendar that all custom fields that are used are transferred. |
In the last status, the migration assistant offers to check if there are any errors. If they are not there, feel free to start the process.
After a successful process, all calendar data will appear in your cloud instance. When checking whether everything is in place, log in with the same user that was authorized in the server version of the jira, and if it is not there, then any administrator of the jira.